Tuesday, December 1, 2009

Advent Book Activity: Dream Snow & Snowflake ornaments

On Monday evening the boys and I did our first advent book activity. You can read about the concept behind these activities in this post. First we decided which boy would get to open which "paper". We decided my oldest boy will open the books in polka-dot paper and my little boy will open the ones in green striped paper. The boy who doesn't open a book will get to pull the activity description out of the felt stockings (Scroll down in this post to see a photo of the stockings. We are just using 15 this year instead of all 25.) Below is a photo of our advent books all wrapped and ready.


Tonight we opened the book Dream Snow by Eric Carle. This is a brand new book for our family. I bought it after Christmas last year at Barnes and Noble, 50% off. It's a great little story with awesome illustrations. I LOVE Eric Carle!!


We made glass snowflake ornaments to go with this book. In my original post back in July I had a link to a specific project from Michael's that inspired our ornaments. The only adhesive backed snowflakes I could find at Hobby Lobby (much closer for me to shop at than Michael's) were multi-colored. I had envisioned using all white but couldn't find a package like that. I picked up 2 glass ornaments with another bonus ornament at my favorite thrift store for 75 cents. Can't beat that price!! So...........our materials were: glass ornaments, foam adhesive-backed snowflakes, and ribbon for hanging the ornaments. I had some snowflake ribbon in my stash. Perfect!


This was a quick and simple ornament to make. The boys were both successful and were excited to go downstairs and hang them on our $3 garage sale tree which has been reserved especially for our advent book ornaments.


Below you can see our finished ornaments. They look so pretty and definitely spruce up a previously bare tree. Just last night I was thinking I'd like to somehow turn images of the book covers from each book we read into ornaments. My wheels are turning on that one. I think that would look really cool. I'm sure Modge Podge will be involved in this project in some way. If you have any thoughts, let me know!


Sunday, November 29, 2009

Advent Wreath

I have very distinct childhood memories of doing an Advent wreath each Sunday night leading up to Christmas. It is one of the only times I can remember my whole family sitting down together to do something (besides our evening meals). It was such a sacred time with the lights off and just candlelight. Because of my strong positive memories of this experience I wanted to be sure my own children have this ritual as part of their childhood. Last year was the first year we started this and my oldest son was very excited to do it again this year. I purchased the candle holder at our local general store (Kally's for you locals). For those of you who are unfamiliar, a candle is lit every Sunday night leading up to Christmas. On Christmas day (or eve) you light the center (Christ) candle. There is special meaning and scripture for each candle. I scoured the internet and found a simple outline for doing this with your family. You can download it by clicking on the link I've provided below the photo. Here you can see our wreath with the first candle lit. My oldest son can now look up the scripture in the Bible and read it out loud. He also read the prayer out loud to us. I am so happy that my boys will remember doing this together as a family. Family traditions are so important and especially those that instill a stronger faith.


Here is a link to a downloadable set of readings to do each week of Advent.

Saturday, November 28, 2009

How I spent Black Friday

Umkay............I'm going to be honest here. Kudos to all of you who get up at the crack of crack to go shopping on Black Friday. Me? I can't think of one material item that would make me get out of bed early on a day off. I know..........I'm missing out on the great deals, the obnoxious crowds, etc. Y'all can snicker behind my back if you went out and got a super buy yesterday. I'm fine with it. Seriously. I just hate shopping in general and if you add a big crowd just the thought of it makes me twitchy. As they say in the blogosphere...........that's how I roll. :0)


In our house we have a family tradition on the day after Thanksgiving. A tradition that is anticipated with great excitement second only (perhaps) to Christmas morning itself. A tradition that, in fact, caused my oldest son to get out of bed at exactly 6:03 because he was so keyed up about it. (You may be wondering why I didn't just get up at that point and head out to the mall since it was so early. Well......DS and I had a little deal where he wasn't allowed to wake me up until 7:00. AND he knew that I was going to run on the treadmill, shower and eat breakfast before we started. It's good to plan ahead.) Here's our tradition: we put up our Christmas decorations. It's something I enjoy doing every year on the day after Thanksgiving. I am very adamant that no Christmas decorations are allowed to go up before Thanksgiving. I believe in letting every holiday have its share of the spotlight. As my boys have gotten older they have become pretty good helpers at getting our fake Charlie Brown Christmas tree assembled and the ornaments hung on it. They pretty much poop out on me after that. In this post I am sharing a few glimpses of our Christmas decorating.


This metal sign was a gift to me from someone...........I don't remember who! If that someone is reading this I'm sorry I forgot you gave it to me. I love it, however. I am going to try to remember this sentiment during the Christmas season. I hate the thought of getting bogged down in all the preparations and thus forgetting to savor the joy.


OK.........I did do a little shopping on Black Friday. I just kept it local and took my mother-in-law who was visiting from Florida to my fave local thrift store to look for some new decorations. I purchased the two types of garland shown below at that store. I love how they look twisted together although the red star garland is so twisty that my MIL and I were both about to curse it! Seriously. There were little red stars all over the floor.


I am not totally thrilled with my corner rack. I loved how I had it decorated for fall. Even though I have a lot of Christmas decorations I haven't been able to find the right groupings for this area. I will go ahead and show what I have so far anyway. It looked better after I put a strand of white Christmas lights on it.


On the top shelf I have a very special Christmas plate that my mother-in-law, Donna, painted me for Christmas last year. She is so artistic. She painted it completely by hand and without a pattern. I love it. It is so elegant looking.


For fall I had filled this Goodwill glass goblet with fall filler. It looks great for Christmas filled with gold-glittered pinecones and shiny gold ornaments.


On the next shelf down I placed a red and white snowflake plate that I bought on BF (Black Friday) for 99 cents at my local department store.


The little trio of trees below were all purchased on BF at my favorite local thrift store. If you are local and coveting these, they have more of all three types of trees. They were each $2 or less. I love them grouped together but would like to find a perfect little tray to place them on.


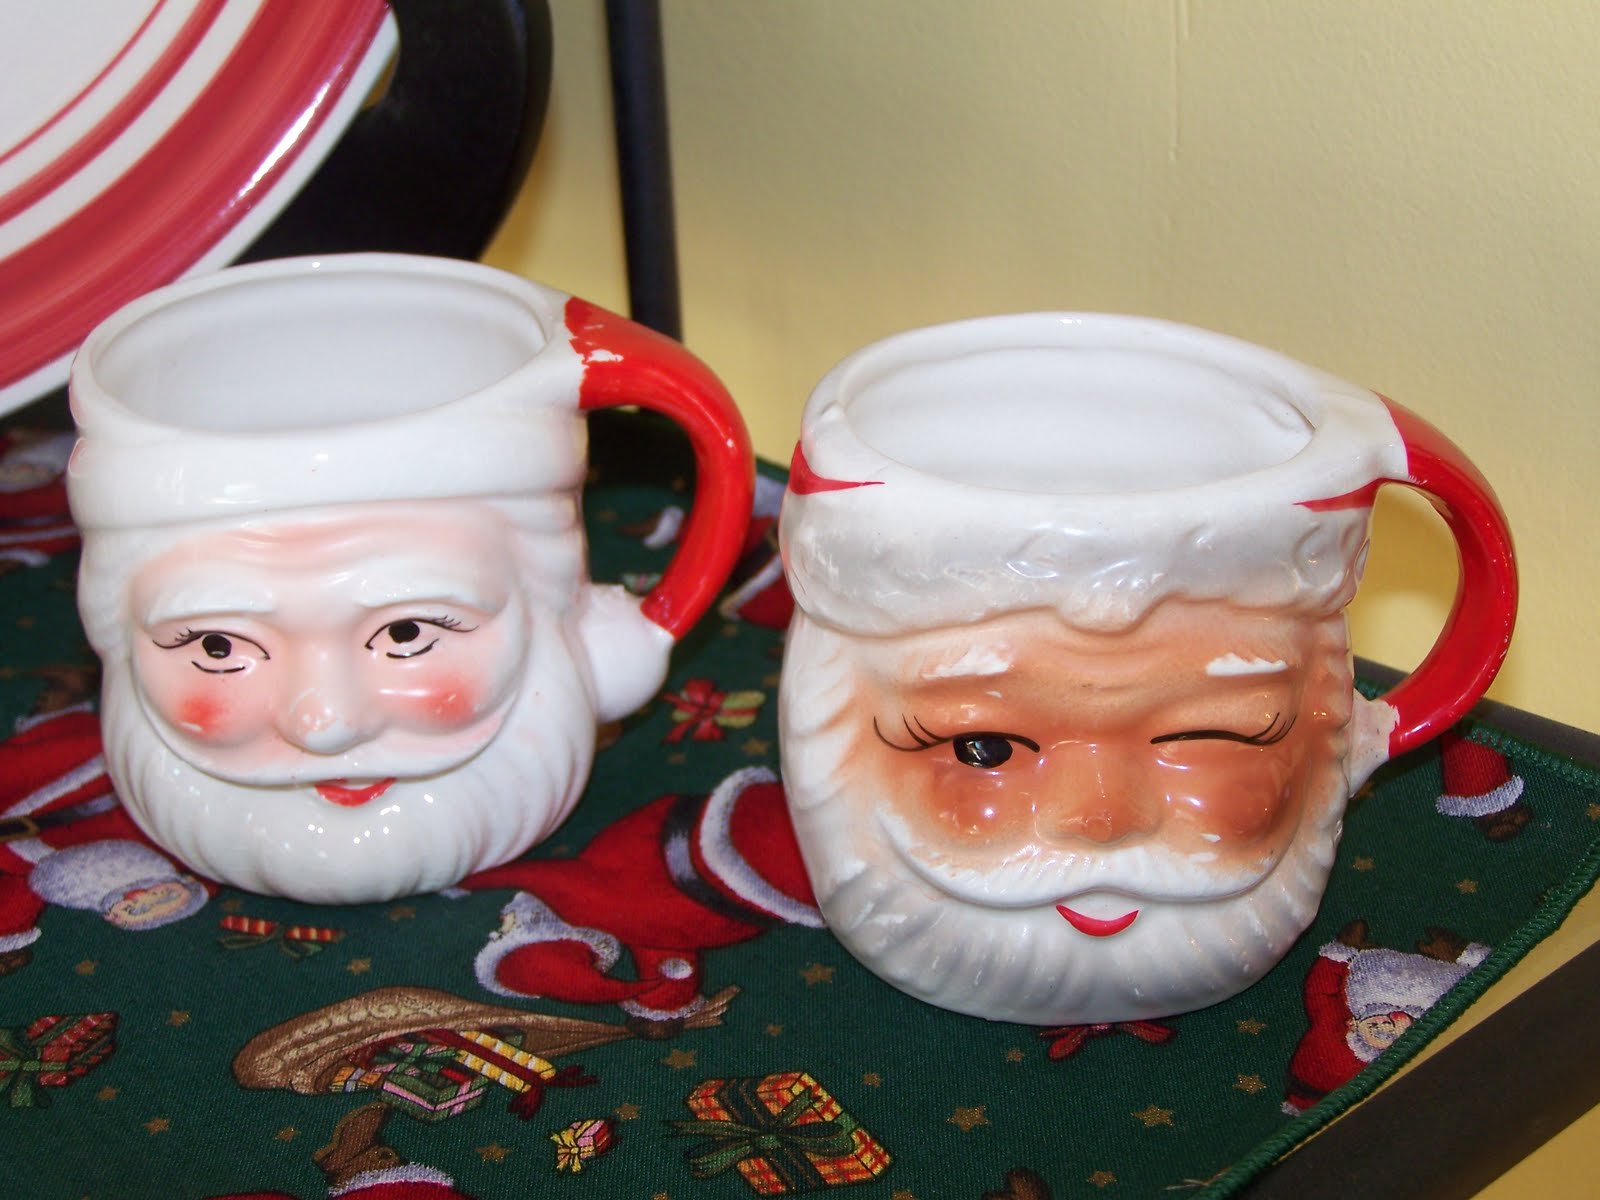
I had picked up one of these Santa mugs at Goodwill over the summer. I was thrilled to find a bunch more of them at my local thrift store on BF. Now I have one for each boy. I probably won't let them actually drink from them as they are vintage and I'm not sure of the lead content in the paint. Someday, however, if they promise to be very careful with them I may let them take them from my house. ;-)
Oh.........I almost forgot to mention that the cute Christmas napkins that I used to cover a few of the shelves were picked up at a garage sale this summer. I think I paid about $1 or less for four cloth napkins. LOVE IT! (Try to top THAT deal all you BF shoppers!)


Below you can see our tree. It is decorated with white lights and a hodge-podge of ornaments which include ones my mom gave me when I was growing up, ones I made as I was growing up, ones I've collected over the years and ones my children have made. I LOVE my tree!


It is fun to have the house looking Christmasy. I am now sufficiently inspired to tackle my long to-do list. I love to handmake many of the gifts I give and unfortunately did not achieve my New Year's resolution to have all handmade gifts done by the end of October. Doesn't look good for finishing by the end of November either. Oh well, what would December be without the annual flurry of gift-making? More on that later............

Tuesday, November 24, 2009

"got thanks?" t-shirt

The other crafty thing I've been wanting to do is make a freezer paper stencilled t-shirt for myself for Thanksgiving. I think this is totally my idea because I have not seen it elsewhere. Using a take-off of the "got milk?" campaign from the Dairy Council I thought it would be cool to paint a t-shirt to wear on or near Thanksgiving that said, "got thanks?" Last night I finally got my act together to make one. I just picked up an orange t-shirt from Target yesterday. Below you can see how it looks. I pretty much like it. I was originally going to use black paint but decided that would look too much like Halloween and used white instead. It looks pretty good in the photo but in person I think I needed one more layer of white paint. I had planned to paint "give thanks" on the back with my two sons' handprints right next to it but I'm not sure that will get done in time for this year's Thanksgiving. Maybe I'll add it later. I'm not sure. Let me know what you think. Is this a weird idea? Will people get it?


"give thanks" pillow

OK.........I've been hinting around about a few projects in the works and I finally buckled down last night and stayed up late to finish one of them so I could post it. Since I've started the new running program I haven't been staying up very late but today was a rest day so I made an exception last night. My inspiration for this project was some burlap monogram lampshades I saw over on Rhoda's blog a while back. I thought it was a great idea and I love doing freezer paper stencilling. Immediately I could envision how cute it would be to do a "give thanks" pillow on burlap with my boys' handprints decorated like turkeys and that is what I decided to try to do.


In case you are unfamiliar with freezer paper stencilling I decided to make this a detailed step-by-step post. If you aren't interested or already know how scroll down to see the finished pillow.

First I found a font I liked and printed out the words "give thanks" in a Word document using landscape orientation. The font I used is called Kristen ITC. I just kept enlarging the font until it pretty much filled up the entire 8 1/2 by 11 inch space. My font size was probably about 200 although I can't remember exactly. I also used bold typeface. Once I had it how I wanted it (I also had to adjust the margins to make them as narrow as possible) I printed it out. I then placed the copy underneath a piece of freezer paper (shiny side down) and traced it onto the printer paper with a pen. See photo below.


The next step was the most tedious and probably took me about 30 minutes. I did it while watching TV. Using nail scissors I carefully cut out the insides of all the letters from the freezer paper. Make sure when you do this to cut out the middles of your letters and don't discard them as you will need to iron them on during the next step.


Once all the letters were cut out I ironed the freezer paper (shiny side down) onto a big piece of burlap. Use a dry iron for this or the freezer paper will get wrinkly. Be sure to carefully iron on the center of your letters with open middles. Check to be sure all edges are adhered securely to the fabric.


Next, using a paintbrush (sponge ones are great for this) tap fabric paint inside all the letters until they are covered as shown below. You may need to add another coat. I usually do this one right after another instead of waiting for the paint to dry between coats. I'm impatient like that.


You will need to let the paint dry for several hours (I usually do this after the boys' bedtime and let it dry overnight). Once it's dry, carefully peel off the freezer paper to reveal your image. This is my favorite part of freezer paper stencilling. It always looks so good when you peel off the paper. I was a little leery of how this would turn out on burlap as I've only ever freezer paper stencilled on knit jersey fabric. It worked like a dream!!


Since I wanted to add the hand turkeys I painted the boys' hands and fingers with the fabric paint and stamped them on either side of the words. This didn't work so well and I had to go back with a paintbrush and fill in the paint quite a bit. I then used more fabric paint to add a bead, wattle, eye and legs to the turkeys. I am bummed about how the black paint for the eyes spread out. I think I was using old paint and it was pretty runny. :0(
This one is my little boy's hand.


And my big boy's hand.


I finished the painting about a week ago and last night I finally headed down to the craft room to sew the pillow. I just cut an even rectangle around the painted part and then used that as a template to cut a second piece of burlap for the back. I sewed the two sides together (paint side out) leaving a very wide margin all around so I could trim it afterwards. I left a hole a few inches wide and stuffed the pillow full of polyester fiberfill. Then I sewed up the hole. It was pretty easy to do this even though the pillow was full of stuffing. The final step was to trim all the edges evenly (eyeballed it) and then fray the edges to give it a fringed trim. The stitching line stops the fraying so I just pulled out strands until I was really close to the stitching. I LOVE the fringed trim. It's just about my favorite part aside from the hand turkeys. Oh.......and I also love how the saying turned out. OK............I just love the whole thing. It's fun when an idea goes from your head to reality and looks as good as or better than you imagined it. This will be a fun keepsake to pull out and display each November.


Here's a close-up of the fringed corner.


If you like this idea but are intimidated by the sewing part think of how cute this would be just done up on burlap, fringed, and hung on a dowel instead of being made into a pillow. You could also frame it. Many possibilities. When I bought the tan burlap at Hobby Lobby I also bought about a yard of red burlap. (Burlap is really inexpensive by the way.) I thought it would be very cute to make some little red pillows with "ho ho ho" stencilled on them for Christmas. So........that's on the to-do list too. A burlap pillow (or burlap in a frame) with a monogram would make a great, easy and inexpensive Christmas gift. Your children could help out with the painting and stuffing part. I have a lot of burlap left and am already thinking of more project ideas. Fun, fun, fun!!

Monday, November 23, 2009

Thanksgiving Story Bracelets

I just wanted to pop in quickly to tell you to head over to my other blog to read about a Thanksgiving story bracelet project I did with my preschoolers today. It would be a fun one for you to do with your own children, grandchildren, nieces/nephews, etc. at home. Read all about it here. I did this at home with my boys a few years ago.

Hopefully I'll get my act together and finish up a few more Thanksgiving projects I've been (sort of) working on so I can post them.

Tuesday, November 17, 2009

Update on THE SHRED

A few of you may be wondering if I am keeping up with doing Jillian Michaels' DVD The Shred. Umm.........no, I'm not. BUT.............I am happy to report that I am not completely neglecting my fitness and health. Although I was seeing benefits from The Shred, I was not doing it very consistently as I was finding it hard to do in the evenings since we are getting so busy with the boys' activities. For a while I had been thinking about taking up jogging/running again. I used to do that fairly consistently before I had the boys but haven't for many years. I was inspired by a couple of my local buddies, Justin and Krystal, who recently trained for and ran a marathon. That is just such an amazing accomplishment. I am truly in awe of them and their efforts. My own DH has been a runner since he was a teenager and has also completed a marathon as well as some half-marathons and many, many other races. His dedication to running is also an inspiration to me. SO..................about a month ago I decided to get serious about it and get going. In the past I've started new exercise routines and done too much too soon which has resulted in burn-out and/or injury. This time I wanted to do it right. So I headed over to the Runner's World website and found a training program for beginning runners. I printed it out and on Saturday I finished my fourth week of the 8 week program. I am proud to say that I have stuck with it and that I am actually getting up early and doing it in the morning. It is fantastic to realize late in the afternoon that I've done my workout for the day. I have renewed energy and my body feels stronger. I've dropped a few pounds already and am definitely getting more toned legs which is a major goal for me. If you have ever thought about starting a running program, I really recommend this one. It tells you exactly what to do each day for 8 weeks. It is easy to follow (I'm doing mine on our treadmill) and provides the perfect amount of challenge at the perfect pace. The end goal of the 8-week program is that you can run for 30 consecutive minutes at a relaxed pace.......they say this would be a distance of about 2 miles. That is a VERY relaxed pace because when I walk on the treadmill I walk at a 15 minute per mile pace. At about 4 weeks into the program I am running over 2.5 miles each time. I realize this will be different for everyone, however. I can honestly say I look forward to my running days. I can't see me giving it up anytime soon. As for Jillian and The Shred, I am thinking about adding it in on the non-running days but haven't yet. My husband keeps cautioning me to take it slow so I don't get injured and I am taking his advice. If you are a runner I'd love to hear from you. Actually, I just love to get comments over here period...........so no need to be a runner to comment. ;0)