Showing posts with label Decorating. Show all posts

Saturday, November 28, 2009

How I spent Black Friday

Umkay............I'm going to be honest here. Kudos to all of you who get up at the crack of crack to go shopping on Black Friday. Me? I can't think of one material item that would make me get out of bed early on a day off. I know..........I'm missing out on the great deals, the obnoxious crowds, etc. Y'all can snicker behind my back if you went out and got a super buy yesterday. I'm fine with it. Seriously. I just hate shopping in general and if you add a big crowd just the thought of it makes me twitchy. As they say in the blogosphere...........that's how I roll. :0)


In our house we have a family tradition on the day after Thanksgiving. A tradition that is anticipated with great excitement second only (perhaps) to Christmas morning itself. A tradition that, in fact, caused my oldest son to get out of bed at exactly 6:03 because he was so keyed up about it. (You may be wondering why I didn't just get up at that point and head out to the mall since it was so early. Well......DS and I had a little deal where he wasn't allowed to wake me up until 7:00. AND he knew that I was going to run on the treadmill, shower and eat breakfast before we started. It's good to plan ahead.) Here's our tradition: we put up our Christmas decorations. It's something I enjoy doing every year on the day after Thanksgiving. I am very adamant that no Christmas decorations are allowed to go up before Thanksgiving. I believe in letting every holiday have its share of the spotlight. As my boys have gotten older they have become pretty good helpers at getting our fake Charlie Brown Christmas tree assembled and the ornaments hung on it. They pretty much poop out on me after that. In this post I am sharing a few glimpses of our Christmas decorating.


This metal sign was a gift to me from someone...........I don't remember who! If that someone is reading this I'm sorry I forgot you gave it to me. I love it, however. I am going to try to remember this sentiment during the Christmas season. I hate the thought of getting bogged down in all the preparations and thus forgetting to savor the joy.


OK.........I did do a little shopping on Black Friday. I just kept it local and took my mother-in-law who was visiting from Florida to my fave local thrift store to look for some new decorations. I purchased the two types of garland shown below at that store. I love how they look twisted together although the red star garland is so twisty that my MIL and I were both about to curse it! Seriously. There were little red stars all over the floor.


I am not totally thrilled with my corner rack. I loved how I had it decorated for fall. Even though I have a lot of Christmas decorations I haven't been able to find the right groupings for this area. I will go ahead and show what I have so far anyway. It looked better after I put a strand of white Christmas lights on it.


On the top shelf I have a very special Christmas plate that my mother-in-law, Donna, painted me for Christmas last year. She is so artistic. She painted it completely by hand and without a pattern. I love it. It is so elegant looking.


For fall I had filled this Goodwill glass goblet with fall filler. It looks great for Christmas filled with gold-glittered pinecones and shiny gold ornaments.


On the next shelf down I placed a red and white snowflake plate that I bought on BF (Black Friday) for 99 cents at my local department store.


The little trio of trees below were all purchased on BF at my favorite local thrift store. If you are local and coveting these, they have more of all three types of trees. They were each $2 or less. I love them grouped together but would like to find a perfect little tray to place them on.


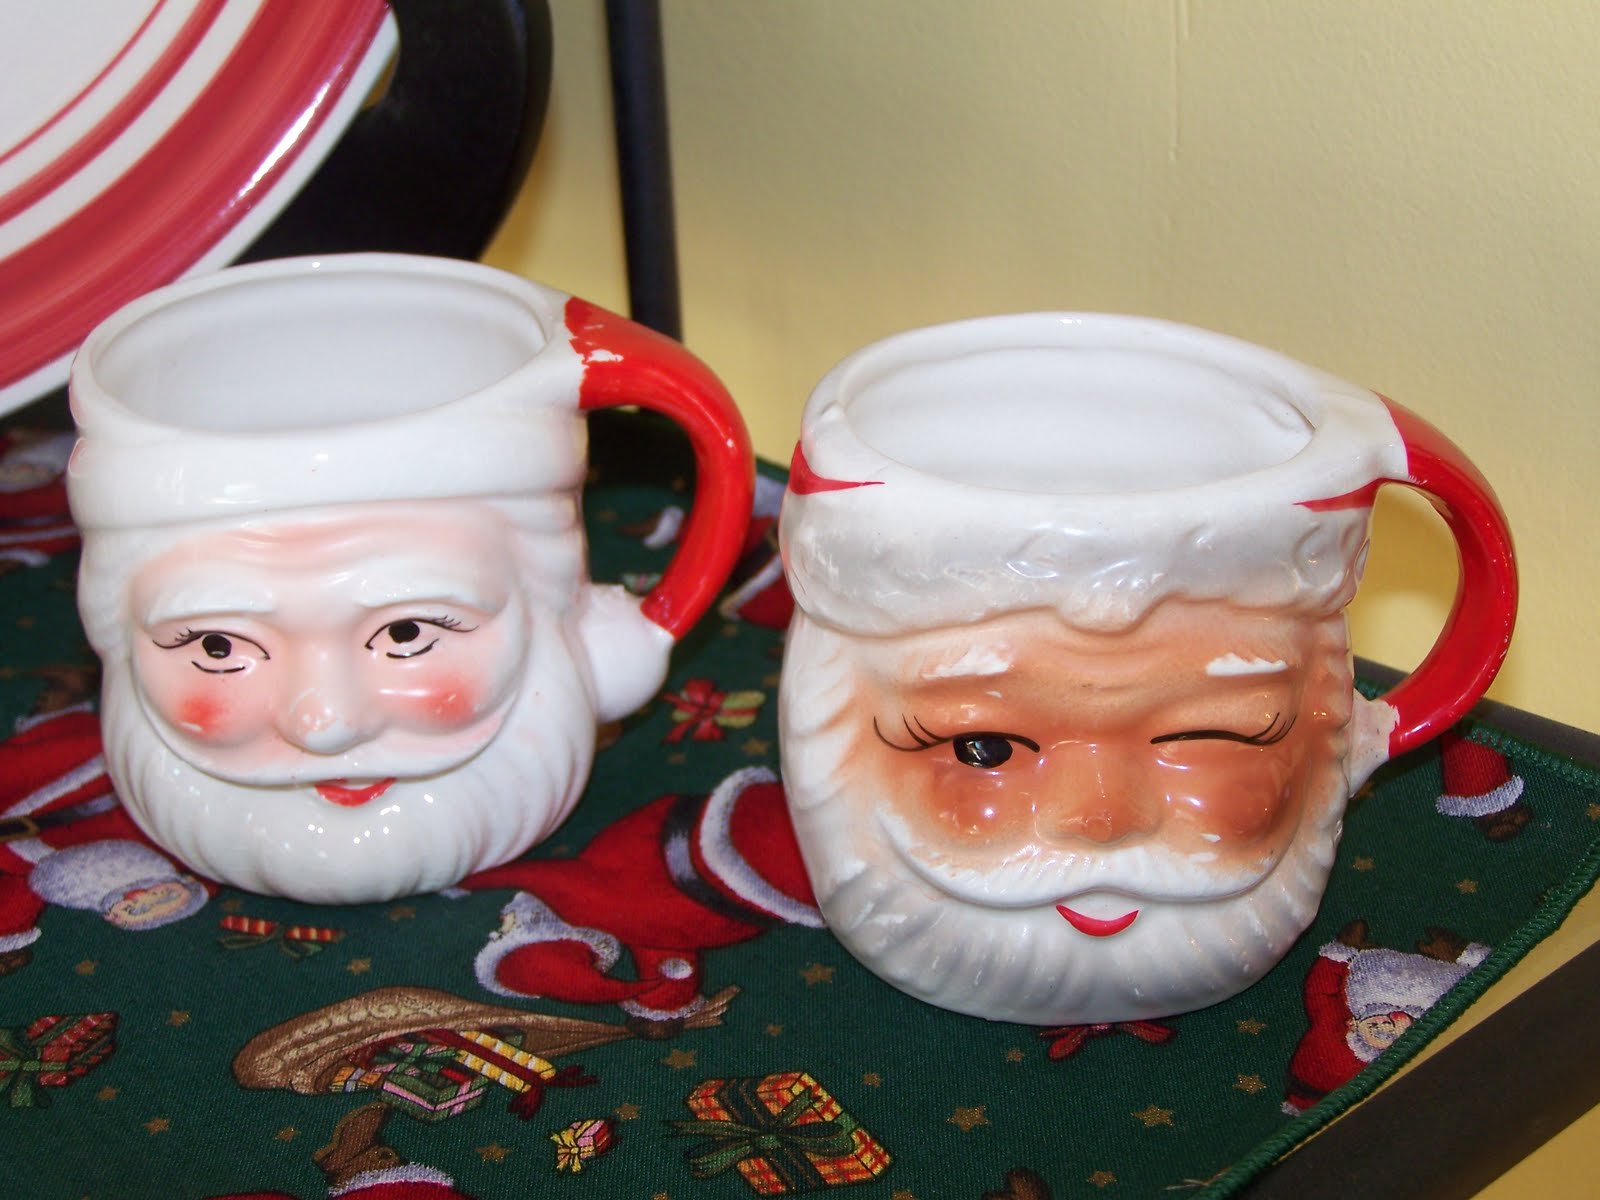
I had picked up one of these Santa mugs at Goodwill over the summer. I was thrilled to find a bunch more of them at my local thrift store on BF. Now I have one for each boy. I probably won't let them actually drink from them as they are vintage and I'm not sure of the lead content in the paint. Someday, however, if they promise to be very careful with them I may let them take them from my house. ;-)
Oh.........I almost forgot to mention that the cute Christmas napkins that I used to cover a few of the shelves were picked up at a garage sale this summer. I think I paid about $1 or less for four cloth napkins. LOVE IT! (Try to top THAT deal all you BF shoppers!)


Below you can see our tree. It is decorated with white lights and a hodge-podge of ornaments which include ones my mom gave me when I was growing up, ones I made as I was growing up, ones I've collected over the years and ones my children have made. I LOVE my tree!


It is fun to have the house looking Christmasy. I am now sufficiently inspired to tackle my long to-do list. I love to handmake many of the gifts I give and unfortunately did not achieve my New Year's resolution to have all handmade gifts done by the end of October. Doesn't look good for finishing by the end of November either. Oh well, what would December be without the annual flurry of gift-making? More on that later............

Monday, September 21, 2009

More signs of Autumn

Today my little boy and I had the day off from school. We were very busy all day but had a good time together. We had a shopping outing and among other things we picked up a bag of various little pumpkins at.........Home Depot! We were going there to buy some more spray paint so DH and I can finish the fort this weekend. When we were headed in I spotted the bag o' pumpkins and had to get them. I have been wanting to get some mini pumpkins to put on top of the pair of candlesticks I bought a few weeks ago at Goodwill. The candlesticks were $2.99 each and look great topped with the white pumpkins. I have seen some really cute home decor using mini pumpkins on some of my favorite frugal decorating blogs. One idea is to adhere letter stickers to three little pumpkins and then line them up to spell "BOO". I may do that with some of my little orange pumpkins.


For now, the rest of my pumpkins from Home Depot are nestled in a wire basket that a very kind friend gave me last year. (You know who you are........thanks so much!) When my oldest son got home today and noticed the pumpkins he said, "Wow! It looks like we're getting ready for fall and Thanksgiving around here!" He's right!! I love fall decorating. I also got 4 fall cloth napkins and a fall candle at Kohls today, but I didn't take a photo of them.


Monday, September 14, 2009

Autumn is (almost) here!!

I love fall. It is practically my favorite season although I love the seasonal changes we have here in the midwest. In the past I haven't decorated a whole lot for fall. Mainly that is because I didn't have many decorations. I am kind of frugal and have a hard time bringing myself to spend money on decorations for my home. I would never pay full price for home decor........I think it is priced ridiculously high in most stores. I have a lot of Christmas decorations, but most of them have been given to me. Over the past year as I've become more immersed in the blog world I have been very inspired by several frugal decorating blogs. It's amazing what great looks you can get without spending a lot of money. During the summer I took several little trips to Goodwill and my favorite thrift store in addition to hitting up several garage sales. As a result I have many new fall decorations to use this year. I have added a bunch of them to my baker's rack (also a summer garage sale find) and I love how it looks now all decked out for autumn. Today I'm going to share with you some of my new decorations.


Here is a full view of the shelf.


On the top shelf is a tray from Goodwill, a pumpkin teapot from Goodwill (59 cents), a green teapot (birthday gift from DH a few years ago) and a garland that I bought at a garage sale for 50 cents.


This shelf has a checked plate ($1 at a garage sale) on a black stand (thrift store) with a thrift store basket filled with another 50 cent garage sale garland. The little white pitcher is from Goodwill for 59 cents.


This shelf has a metal basket (thrift store) that I'm hoping to fill with rolled up fall napkins or placemats. I might have to sew my own.........haven't found any I like yet. The metal AUTUMN sign was $3 at a garage sale and the metal pumpkin was 99 cents from Goodwill.


The bottom shelf has a fabric pumpkin that I bought MANY years ago at a craft show, leaf garland from a thrift store or garage sale (I can't remember), yellow metal bird from Hobby Lobby and a little leaf dish I just bought today at my local thrift store.


I hung a little fabric HARVEST wall-hanging that I made several years ago above a shelf in the dining area. I'm experimenting with this, but I think I will leave the candy corn lights up. I just bought them today at my fave thrift store for $3.50.


Close-up of the candy corn lights. I am thinking of picking up another strand to hang in my Montessori classroom this season.


This weekend I finally hung up my chicken quilt. It looks awesome! Thanks, Mom and Dad!! On the shelf below it I put a metal platter that I just bought at the thrift store today and another fabric pumpkin that I also bought today at the same store.


Here's a close-up of the platter and pumpkin.


I would still love to find a few chunky candlesticks to hold some mini-pumpkins. I'd also love to find some autumn "filler" for some glass candle holders I have. My sons are getting old enough that I think they would leave lit candles alone, so maybe I can start to enjoy candles again. Even safer, however, are those little flickering LCD candles. I love those too! How do you decorate your home for fall?

Thursday, June 18, 2009

More home dec projects

I finally have a few more home decorating projects completed and ready to share. First up, I bought a white wicker frame at Goodwill last month for about $2. I knew immediately that I wanted to transform it into a chalkboard for my kitchen. Below you can see how it looked when I started. And may I add that my grass looks amazingly lush and green in this photo? Wow!


I went to Home Depot and had a very nice guy in the lumber department cut me a piece of thin MDF for the backing of the chalkboard. Did you know they will cut wood to measure for free? I asked the guy if he charged anything per cut and he said, "Just a smile." Well, that was easy. He told me he had waited on a really grumpy lady earlier that day. So I was really nice to him. Although I would have been nice anyway cuz I'm just like that. :0) Anyway, I spray painted the frame Colonial Red and the piece of wood with chalkboard spray paint. I used only 2 coats of the chalkboard paint, I think. I cured the chalkboard as recommended by rubbing a piece of chalk all over it prior to first writing on it. It doesn't erase quite as well as I would like. If I use a damp cloth, it cleans up pretty well, however. Below you can see it on my kitchen wall next to two framed chicken prints. DH just hung these for me last night. I have more plans for this area and big plans for the outdated heart shelf. Hopefully I'll get those done soon so I can share.


See how it's kind of smudgy? Maybe I should have sprayed more coats of the chalkboard paint. If you've used it and have suggestions, please comment.


I printed the chicken prints on white cardstock on my computer. The images are from The Vintage Moth. This is a really cool blog that has tons of public domain images that you can download and print for FREE! I bought 2 frames at my fave thrift store. One was already black and I sprayed the other one. Voila! Nearly free artwork!


I bought this plant holder for around $8 or less (I can't remember exactly) at my favorite local thrift store. I've been wanting to spray paint something with Rustoleum Green Apple and this was the perfect project.


Below is my finished planter sprayed with Green Apple. I bought a coconut liner at Home Depot and added the flowers. This is now hanging on the wall of our home just outside one of our entry doors. I love it! I think it looks so fun and fresh with the apple green paint.


Now, on to the bathroom. The next two photos are the "before" pictures. My bathroom has been pretty much the same and pretty much boring for several years.
My laundry is in the main bathroom. You can see my clothes drying rack and laundry basket complete with clothes............just keeping it real!!


I posted a while back about this "hairy" little nightlight lamp that I bought at my fave thrift store. Now it is at home on my bathroom counter.


I decided to continue my "French country" decor into the main bathroom since it is in the hallway right off the living room/dining room/kitchen. Keeping the same color scheme and using the same fabrics will provide continuity throughout my home. So, I used leftover fabric from my living room/dining room/kitchen transformation to make a custom shower curtain for our bathroom.


Below the window where I previously had a basket of rolled towels on the floor and my clothes drying rack, I added a little shelf that I scammed off my parents. My dad actually made it himself MANY years ago. It was just sitting in their garage and my mom let me have it when I asked. She's nice like that. I was thinking about painting it, but I think I actually like it as is for now at least. I bought some new towels to go with the new decor. I actually really needed them because my old ones were starting to fray. I also bought a new clothes hamper. My old white plastic one was torn and cracked and really needed to go. I placed the clothes rack in the space between the wall and the washing machine. It's amazing how these little changes have completely transformed my bathroom.


I LOVE LOVE LOVE this little white basket that I found to put rolled washcloths in. I bought it at...........my favorite local thrift store for about $3. LOVE. IT. The fact that it has chicken wire is really awesome since I'm going to soon be a CHICKEN FARMER!! ha

I have several more projects in mind for the bathroom/laundry room. Hopefully those will get done soon too so I can post.

I made a little trip to Goodwill tonight while DH took my boys to a high school baseball game. I haven't taken photos of my "treasures" yet, but I'll try to do a post about them soon. When I go without the boys, I like to take time to clothes shop. I found 3 new tops, a new skirt, a totally cute new pair of sandals, a little white apple and a fall tray for my baker's rack this fall. SCORE!
Gosh I love thrifting!! You never know what you'll find.

Thursday, June 4, 2009

Woohoo!

Warning: This is a very long post with LOTS of photos. I am so excited to finally be able to show off what I've been creating for our master bedroom. A month or so ago I started the process of decluttering and making over our bedroom. You can see the before pictures in this post. When I began this process I already had a quilt that I loved and a wall color that I loved. So I based my decorating color scheme around that. I've been gradually collecting accessories at garage sales and thrift stores. I've also been repurposing some items from around our home. So........here we go.


The photo below shows 2 oval mirrors in pewter frames. I bought these at my favorite thrift store right here in my hometown. They were $6 each............a little pricey, but I hadn't found anything else like them anywhere else and they were perfect for my project. Be patient.........I'll show you the finished product shortly. :0)


This large gold L is from Hobby Lobby. It is about 10 inches tall. I bought it when the wall decor was 50% off, so it was around $5.


My plan was to use the above items to create a monogram over our bed. I removed the oval mirrors and spray-painted the frames and the L with Colonial Red paint. Below you can see the view of the monogram from the doorway of our bedroom. They hang right below the shelf that I wrote about in this post.


The next two photos show it more close up. To complete the monogram, I had purchased metal letters for my husband's and my first names from Hobby Lobby a while back. They were originally black and I spray-painted them Heirloom White. I hung them from the red oval frames with a piece of black gingham ribbon. They are the teeniest bit larger than the frames, but I kind of like the dimension that adds to it.


The wall color looks washed out in these photos, but it is a really pretty soft blue.


Below is a close-up of my initial.


To cover the exposed screw head, I adhered a pretty button to it using a Glue Dot. Hopefully that will hold it on. If not, I'll hot glue the button on.


OK.........next up.........I bought 2 ugly gold plastic candle holders at a garage sale for 75 cents each. The white wicker frame is for another project I haven't shown yet. I'll keep you in suspense on that for now.


Using my Colonial Red spray paint, I transformed the ugly gold candle holders into something striking and beautiful.......just right for my bedroom makeover.


I hung these next to the trio of white tin squares. The candles were bought on clearance at Hobby Lobby for 46 cents each!!


It could just be my imagination which is clouded by a spray paint fog, but I really think that now these look like painted wrought iron as opposed to cheap plastic.


The black metal candle holder shown below has almost been relegated to the garage sale pile. However, I decided to spray paint it red and add it to my bedroom as an accessory.


The two shelves in the photo below were originally in my basement and were brown. I painted them Heirloom White and they are now on my bedroom wall. I pulled together found and thrifted items to accessorize them. The tulip photo is one I took many years ago of a tulip we grew in our yard. It was already matted and framed but the frame was black. Colonial Red spray paint to the rescue! It matches the colors perfectly. I already had the white glass vase. On the other shelf, the red candle was a gift from one of my students, the white plate was a Goodwill find, and the white seashell ball was from my favorite thrift store for $3. On top of the red candle holder it almost looks like a topiary.


Here you can see the detail on the seashell ball. I love it. So unique!!


I hope you've enjoyed this little tour. I have more projects up my sleeve that I will hopefully complete soon so I can share them. I have to dedicate this post to Sarah at Thrifty Decor Chick. When I stumbled upon her blog a few months ago, my eyes were totally opened to what I could do to make my home more beautiful on a small budget. Thanks, Sarah, for your decorating inspiration!!

Monday, June 1, 2009

Sneak peek!!

I am really excited about a few home dec projects that I've been working on. I had out my can of Colonial Red spray paint today and this evening I made a trip to Home Depot and Hobby Lobby. I have lots of things in the works that I can't wait to post about. Until these projects are finished............here's a sneak peek. Anyone want to guess what I'm doing? By the way........if you want to totally be inspired by what others are creating, go immediately to this post from Thrifty Decor Chick. You will be blown away by the Goodwill/thrifted items that people have transformed into beautiful home decor.


Friday, May 29, 2009

Randomness

One thing I wanted to post about is Muffin Tin lunches. I think I wrote about these last summer on my other (the original) blog. However, they are really great so I thought I'd write again. This is one of the best ways I've found to get my 4 year old to eat a balanced lunch. I simply place a different healthy food in each compartment. He loves it and I feel good about what he's eaten. Below is what I put in his tin today: (top L-R: ranch dressing, cheese crackers, pudding; bottom L-R: carrots, cheese cubes, blueberries). I have found that he eats a lot more and a wider variety when I serve his food this way.


Next on the random list................check out this fabulous lamp I found at a yard sale today for.................$1!! It is so unique and gorgeous. When I brought it home DH said, "What are you going to do with all these lamps you're bringing home?" Ummmmm, hello! I'm going to create ambiance in our home.


One other thing I don't think I posted about.........I recently purchased a Cubicals organizer for our home. I have one at school in my office and LOVE it! Each canvas bin holds SO MUCH STUFF!

Just to keep things real.......the next photo shows the corner of our office BEFORE I got the organizer in place. Now the toys have their own little drawers and my boys are (for the most part) keeping things better organized and putting them away better. It also helps them more easily find what they want to play with.

The next two photos show the contents of two of the drawers. One holds all our toy animals and another all our toy vehicles. These bins seriously hold SO MUCH stuff. They're awesome. I bought the whole set-up at Target..........I waited for it to go on sale first. It usually does go on sale a few times per year.


The next photo shows the way I'm using the same organizer in my office at school. I have a bin for each month Sept-May which holds all my seasonal decorations and materials.
To fancy up the drawers of this one I made tags labeled with the name of each month and tied on decorative ribbons.
Here's a close-up of my "September" drawer handle.